Showing 48 items matching pottery classes
-
 Vision Australia
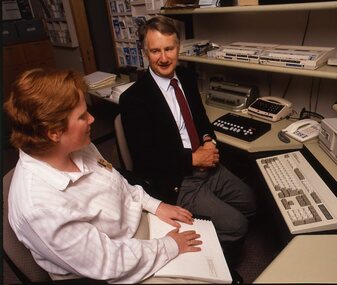
Photograph - Image, Robin Pleydell with female staff member and client
... Col. transparencies of Robin Pleydell in a pottery class... and client Col. transparencies of Robin Pleydell in a pottery class ...Robin Pleydell looks on as an AFB worker reads from a Braille volume whilst sitting in front of a computer, and also with a vision impaired older woman working on a piece of pottery.Col. transparencies of Robin Pleydell in a pottery class and at a workdesk.association for the blind, robin pleydell -
 Federation University Historical Collection
Book - Scrapbook, Ballarat School of Mines Scrapbook, 1899, 1872-1908
... pottery classes... pottery charles fenner pottery classes maurice copland plumbing ....1) Scrapbook of newspaper clipping in oversize scrapbook .2) White file of newspaper clippings 1872-1908newsclips, newspaper cuttings, schools of mines, sale school of mines, bairnsdale school of mines, daylesford school of mines, castlemaine school of mines, bendigo school of mines, stawell school of mines, st arnaud school of mines, alfred mica smith, industrial institute, james bickett, redmond barry, ballarat school of mines opening, mining engineering, pottery, charles fenner, pottery classes, maurice copland, plumbing, harold herbert, ballarat school of mines statistics, andrew anderson, j.c. molloy, art schools, ballarat west art school, herbert h. smith, amelia h. troon, martha pinkerton, r.t. vale, david ham, clunes, rivett bland obituary, university of melbourne affiliation, gilbert dawbarn, kernot, james patterson, john rowe, cassilis chlorination, r.w. lamb, j. flegeltaub, tasmanian examination, balarat school of mines museum, latham watson, state school students, w. longstafff, daisy ditchburn, e. grownow, ballarat east art school, art gallery association technical art school, e. guse, j.g. williamson, m.f. williamson, george biknell, print engraving, a.e.c. kerr, a.n.a. fete, hannay electro-cyanide process, james oddie, r.m. serjeant, xrays, roentgen xrays, lizzie drape, mines bill, henry forster, technical education in germany, deeble's patent, p. cohen, deeble's cyanide plant donation, h. rosales, thomas hart, ballarat observatory, robert denham pinnock, isaac james jones, edward ivan rosenblum, samuel ernest figgis, r.w. best, thomas f. morkham, beatrice j. flude, bertha craig, drucilla hopwood, george bird, james galbally, mining exchange, transit theodilite, univerisity of melbourne, affiliation, t.d. wanliss, scrapbook, s.e. figgis, j. dawbarn, gilbert dawbarn, g.g. simpson, brown coal, parwan, bacchus marsh, a. berry, f.m. krause, practical mining, cassilis, tasmanian exhibition, ballarat school of mines dilapidated, thomas bath, cyanide, elextirc rock drills, herbert franklin, frank bruce, henry rivett bland, j.n. dunn, dr pinnick, theo williams, steiglitz gold mines, meredith, a.f. balderson, j.m. bickett, f.j. martell, cosmo newberry, m. lindsay, pyrites, pyrites roaster, blucjer amagamator, ludovico hart, photographer, art gallery association's technical art school, ballarat east school of art, otto riegelbuth, hugh colquhoun, louis lemp, g.a.f. soderstron, e. gude, a.f. tweedie, m.l. tuxen, george h. bicknell, c.v. brind, a.h. troon, r. flohm, c.s. proctor, m. oddie, b.s. williamson, f.h.w. robinson, photography classes, i.g. wittkowski, h.r. murphy, mary browne, technical education, andrew berry, r-ray, xray, watson's focus tubes, rohmkorff coil, treloar, wooster, t.e. molloy, w/m/ acheson, ladies art association, ballarat art gallery association, maud glover, bertha s. williamson, hnery foster, native telurides of gold, eliza kershaw, edith curnow -
 Federation University Historical Collection
Book - Scrap Book, Ballarat School of Mines Scrap Book, 1924 - 1929, c1931
... pottery classes... planting smb ball pottery classes delineascope mica smith ...The Ballarat School of Mines was a predecessor institution of Federatin University Australia. The scrap books were kept by the librarians and related to topics of interest to the Ballarat School of Mines, its students and its staff. 17 December 1954 - Ballarat Junior Technical School Headmaster's Report 05 February 1925 - Ballarat School of Mines Museum closure 25 February 1925 - War Trophies Museum 06 May 1925 - Ballarat's Museum. Where is it? Some Interesting Facts 14 May 1925 - White Flat Reserve 21 June 1928 - Ballarat School of Mines Procession 14 March 1929 - Mr A.D.R. Galloway - An Australian Abroad - Tragic end. 1929 - Technical Education 17 October 1929 - Agricultural Engineering 15 February 1930 - Ballarat School of Mines Student Association 20 February 1930 - 61s Annual Meeting of the Ballarat School of Mines 02 June 1930 - R. Young in Belgium and visits battlefields including Hill 60. 19 February 1931 - School Hostel Suggested 14 April 1931 - Frank Pinkerton Obituary 15 October 1921 - Life at Mt Isa (E. Loveland) 18 February 1932 - Discussion on Teachers College (Ballarat Teachers' College) 11 July 1931 - Phoenix Model Locomotive donation to the Ballarat School of Mines 06 May 1932 - The Mt Isa Country 11 Oct 1932 - Death of F.W. Alsopp (former SMB student) 21 January 1933 - Education In Victoria: Will a New Era Open 28 September 1933 - New Teaching System Explained by the Minister 17 February 1934 - Trip to New Guinea (A.F. Heseltine) 19 April 1934 - Early Ballarat - Address by Nathan Spielvogel 30 August 1934 - Ballarat Junior Technical School Tennis Court 23 August 1934 - Welding plant and Battery 17 June 1935 - Men about Town - A.F. Heseltine 21 June 1935 - Vocational Guidance 16 July 1935 - Ballarat School of Mines (history) 03 August 1935 - Men About Town - William H. Middleton 10 August 1935 - A.E.C. Kerrballarat school of mines, martha pinkerton, scrap book, a.w. nicholson, john lynch (junior), mount lyell, leslie evans, leslie blake evans, herald shield for athletics, ballarat school of mines museum, motor mechanics' classes for ladies, farm engineering, villers bretonneux carvings, trengrove, museum, port pirrie, j.i. simpson, reuben s. russelll, ballarat technical art school, charles harvey, elliott gower, la gerche, c. curnow, applied art, macroberston scholarship, ballarat school of mines procession, rag, vale park tree planting, smb ball, pottery classes, delineascope, mica smith scholarship, james peart, burma mnies, smb excursion to western australia, kalgoorlie, elsie mckissock, war trophies, warwick smith, spencer street bridge, war museum, richard j. young, alfred mica smith obituary, reginald callister, john rowell, sewerage installation, h.h. smith, w.h. middleton, olive scott, dolly whitehead, vale park, ballarat war museum opening, repatriation classes, sewerage at the ballarat school of mines, australian coals, j.p. ellsworth, yallourn, w.g. walker, reunion, norfolk island pine, mica smith memorial, jessice smith, harry fern, t. henderson, bhp, john adam, ols students' association, l.b. curnow, laura crouch, signwriting, excursion, port pirrie excursion, albert potter, pearl fricke, technica school sports, percy trompf, ballarat school of mines battery, albert mclean, a.d.r. galloway, alan douglas richard galloway, r.j. young, alan ludbrook, r. timpe, ballarat ironworkers and polytechnic association, h. jolly, carpentry, harold jolly, millinery classes, phoenix model locomotive, s.j. morgan, r.d. bannister, juvenile industrial exhibition, w.h. shaw, j.c. winds, f.h. davis, h.r. worland, w.t. magee, l. george, l. balhausen, white flat oval, resue from yarrowee creek, e. berriman, ballarat teachers' college, reg mcconnell, mount lyell co, munro reaper, munro reaper model, weaving classes, mervyn trimmings, briquette dust, edna findlay, jean rogers, n. mccallum, jessie glass, classroom ventilation, art metal, charles fenner, levi molyneux, olice scott, poster competition, kerr grant, w.h. steane, h. caddy, colvin smith, claude creelman, robert colins, stan hillman, n.c. heathcote, egg collection, john alexander, nornie gude, charles deane, graham hopwood, roswald john dart, max wilson, new battery, jess hopwood, william middleton, a.e.c. kerr, hand weaving classes, m. martin, a.h. leeson, mona rogerson, lorna bailey, prospectors classes, edwin robinson, kalgoorlie vist, railway locomotive -
 Federation University Art Collection
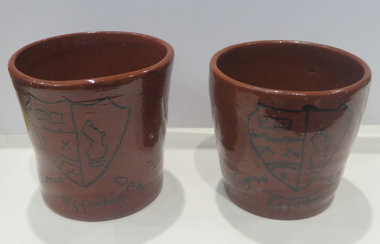
Ceramic - Artwork - Ceramics, Ballarat School of Mines Sherry Glasses, c1951
... enrolled student, Majorie Garner attended Pottery classes... not a fully enrolled student, Majorie Garner attended Pottery classes ...Marjorie Evelyn GARNER Although not a fully enrolled student, Majorie Garner attended Pottery classes at the School of Mines) run by Neville Bunning. She also took advantage of other classes offer to 'non-students' such as oil painting classes for women run by Geoff Mainwaring. These popular extension programmes promoted the Ballarat School of Mines and their Technical Art School, especially among middle-class women who would otherwise have had little connection with the institution. Majorie was married to Leslie Garner, the Principal of the Ballarat Junior Technical School, a division of the Ballarat School of Mines. Two hand thrown ceramics 'sherry glasses' with the Ballarat School of Mines shield in oxide. The glasses are houses in a small blue and white lidded box. marjorie garner, leslie garner, geoff mainwaring, neville bunning, alumni, ceramics, ballarat school of mines, ballarat junior technical school -
 Ballarat Heritage Services
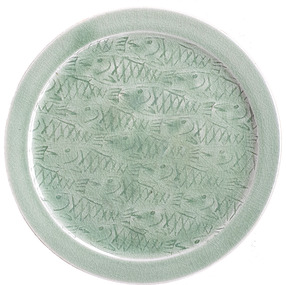
Ceramic - Studio Pottery, John Gleeson, Ceramic Platter, 2007
... fell in loved with pottery during a hobby class in Geelong... fell in loved with pottery during a hobby class in Geelong ...John GLEESON Living at Campbell's Creek for over 30 years, John Gleeson makes a range of functional stoneware pottery. He fell in loved with pottery during a hobby class in Geelong in 1972. He worked for a year at Canny Ridge Pottery in Harcourt. John Gleeson uses white stoneware and porcelain clay from The Bendigo Pottery, and buff clay from Bennetts Pottery in Adelaide. He mixed all his own glazes from commercially sourced raw materials, sometimes supplemented with ash from his fire and local red clay to get special effects.Large celadon platter with incised fish design. john gleason, studio pottery, ceramics, australian studio pottery -
 Federation University Art Collection
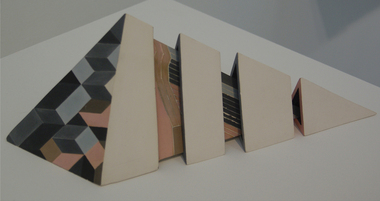
Ceramic - Artwork - Ceramics, "Four Part Triangular Form' by Kingsley Marks, 1984, c1984
... . He became interested in pottery after attending a class one.... He became interested in pottery after attending a class one ...Kingsley MARKS (1929 - ) Kingsley Marks trained at the South Australian School of Art before teaching secondary schools. He became interested in pottery after attending a class one night a week at the John Martins building in Adelaide. He received grants to travel and study ceramics in Mexico the US and Canada, then taught for twenty years at the Torrens and South Australian Colleges of Advanced Education. Upon his retirement in 1985, he moved to Brentwood near Minlaton and established the Brentwood Pottery, specialising in sculptural work using a range of forming, decorative and firing techniques. (https://www.flickr.com/groups/1281707@N21/discuss/72157641492795284/) Kingsley Marks was a guest at Strezleckie Spotkanie in 1984. This work is part of the Jan Feder Memorial Ceramics Collection. Jan Feder was an alumna of the Gippsland Campus who studied ceramics on the campus. She passed away in the mid 1980s. Her student peers raised funds to buy ceramic works in her memory. They bought works from visiting lecturers who became leading ceramic artists around the world, as well as from many of the staff who taught there.Electric kiln-fired slipcast decorated earthenware. Kevin Marks uses the mark "K" on his work. Gift of the Artist, 1984ceramics, kingsley marks, artwork, gippsland campus, churchill, brentwood pottery, artist, jan feder memorial ceramics collection -
 Federation University Historical Collection
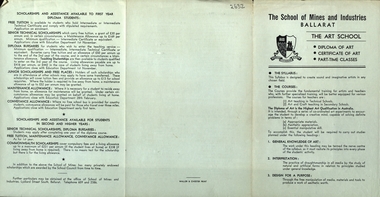
Document, Waller and Chester, Ballarat School of Mines and Industries Ballarat: The Art School, c1948
Entrance requirements for a full-course student was an Intermediate Certificate of equivalent. The Certificate of Art was a two year course of basic study to enable students to undertake a further two years of specialised training in a chosen field of art. The Diploma of Art was a two-year course of specialised training available to students, who have passed the Certificate of Art Examination or its equivalent. Candidates of the examination must be at least 19 years of age, must have completed two years' full -time training or not less than three years' part-time training, and must present for the Matriculation examination for English Expression. Part-Time classes at the Ballarat Technical Art School c1948 were: Day: Dressmaking, Weaving, Leatherwork, Pottery, Metalwork, Painting, Sculpture, Junior Art. Evening: Dressmaking, Weaving, Leatherwork, pottery, Metalwork, Painting, Sculpture, Ticket Writing, Lettering, Figure Drawing. Two fold, 6 page information flyer on classes held at the Ballarat Technical Art School. The Art school offered Diploma of Art, Certificate of Art and Part-time classes.ballarat technical art school, art, diploma of art, certificate of art, part-time classes, syllabus, design, scholarships, diploma of art in pottery, diploma of art in advertising, art education, dressmaking, weaving, leatherwork, pottery, metalwork, painting, sculpture, junior art, dressmaking, weaving, leatherwork, pottery, metalwork, painting, sculpture, ticket writing, lettering, figure drawing -
 Federation University Historical Collection
Book - Scrapbook, Ballarat School of Mines Scrap Book, 1916-1920
Red hardcovered scrapbook with news clippings relating to the Ballarat School of Mines.ballarat school of mines, world war one, news clippings, scrapbook, william e. moon, john h. smyth, david l. thomas, clay, maurice copland, repatriation, g. buchanan, j.m. bickett, harrie wood, cliff garrad, harold c. cornell, f.g. marriott, technical education, classes for soldiers, w.h. middleton, e.j. cannon, ted cannon, ponsonby carew-smythe, boer war memorial, amalie feild, antarctica, fred middleton, richard vale obituary, rand, stephen richards, richard g. walker, world war one chemists, frank tate, free instruction for soldiers, ken moss, girls' preparatory, eureka stockade pageant commitee, fred g. middleton, shackelton relief party, aurora, emil gutheil obituary, henry james hall obituary, william elphick moon, arthur tandy, john mcwhae, harold bieske, james millhinch bickett obituary, wild flower show, technical schools conference, ballarat, allan t. perry, ballarat pottery clay, citizen soldiers' camp, george buchanan obituary, clifford garrard, james dyer woolcott obituary, frank penhalluriack, w.s> penhalluriack, annie whitla, ballarat school of mines jubilee, anniversary, university classes, maurice copland obituary, boot repairing, museum rennovation, bootmaking, f.g. marriott obituary, vocational training classes, j.d. woolcott obituary, ferdinand krause obituary, ferdinand krause, emil guthiel, cornell, spanish flu, pneumonic flu, pandemic -
 Ballarat Clarendon College
Hand painted pottery
The maker of this bowl has not been identified but we might presume it to be one of the 'Susan's' of the CPLC Class of '66. The bowl was created as a memento for the Class of '66 25 year reunion held in 1991. Tiny hand-painted pottery dish with blue and yellow borders and designAround rim of bowl: CLASS OF '66 REUNION 1991 On base: SUSANreunion, clarendon presbyterian ladies college, 1966 -
 Federation University Historical Collection
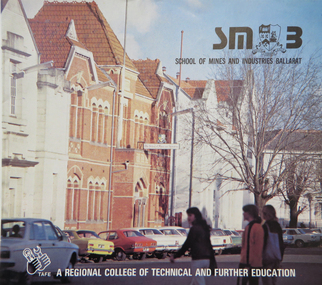
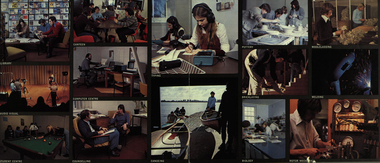
Booklet - Brochure, School of Mines and Industries Ballarat: A Regional College of Technical and Further Education
A folded colour poster outlining the courses available at the Ballarat School of Mines, and a number of photographs of students and classes at the School.ballarat school of mines, tafe, library, audio visual, student centre, canteen, computer centre, counselling, typing, canoeing, pottery, ceramics, bricklaying, biology, woolclassing, welding, motor mechanics -
 Federation University Historical Collection
Book - Scrapbook, Ballarat School of Mines Scrapbook, 1936-1948
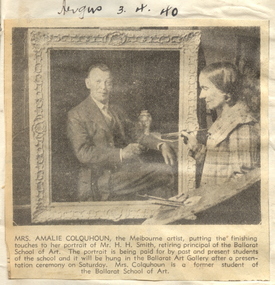
The Ballarat School of Mines was the first school of mines in Australia.Exercise books of newspaper clippings relating to the Ballarat School of Mines. Clippings include: 12 Feb 1936 - State Scholarships 12 March 1936 - Dr J.R. Pound 19 March 1936 - MacRobertson Scholarship 23 March 1936 - gift to the museum - Wardle and Jermyn donate timber specimens 11 May 1935 - A.W. Steane 13 June 1936 - Frederick Longhurst appointed art instructor 27 July 1936 - Ballarat Junior Technical School Reunion 11 Sept 1936 - Wiltshire Poster Competition 30 Oct 1936 - Dressmaking classes 20 NOv 1936 - Nornie Gude NOvember 1936 - Ballarat School of Mines Reunion 16 March 1937 - Oval for Ballarat Junior Technical School - White Flat 11 Nov 1937 - Poster competition - Betty Brown and Albino Paganetti 08 Feb 1938 - Frederick J. Martell obituary 07 July 1938 - Henry Kum-Yuen 14 July 1938 - Red Cross Competition for Women 06 Aug 1938 - School Pine Plantation at Vale Park 19 Aug 1938 - Memorial trees planted at Ballarat Junior Technical School to the memory of Cliff Ellis and Ken Butler 06 March 1939 - Ballarat School of Mines Reunion 16 May 1939 - Ballarat School of Mines Battery 19 April 1940 - Progress of Technical Education - New Engineering workshop opended by Sir John Harris 03 June 1940 - W.H. Middleton obituary 16 July 1940 - Training munition workers 30 May 1941 - Lady Tracers 19 Oct 1942 - War Poster competition 24 February 1944 - Ballarat School of MInes Record Enrolments Feb 1944 - D.F.C. for Ballarat Airman H.J. Trevenen 11 Feb 1945 - Harold Herbert Obituary 14 Oct 1945 - Technical Schools in Wartime 23 Feb 1946 - Molasses and Chaff for SMB Initiates 06 June 1946 - Plans for Victory Ball 13 Sept 1946 - Ken Walker sculpts Prime Minister Chifey's bust 23 Aug 1946 - Edgar McConnon obituary 24 Oct 1946 0 Retirement of A.F. Heseltine 25 Nov 1946 - Army huts for classrooms 12 Dec 1946 - Proposed New Theatre for Ballarat by Geoff Richards 16 Dec 1946 - Ballarat Junior Technical School Old Boys who served in armed forces during World War Two 28 July 1947 - Pottery section at Ballarat School of Mines 31 July 1947 - Red Cross Hut removed to the Ballarat School of Mines 10 March 1948 - Guncotton Factory buildings to become nurses quarters 18 March 1948 - Samuel Mayo Obituary ballarat school of mines, ballarat techncial art school, swimming shield, ballarat school of mines museum, ballarat war museum, sydney pern, t.m. pescott, c.w. brazenor, victory ball, w. rowe, joan walker, graeme dowling, ken walker, prime ministers' avenue, ben chifley, amalie feild, amalie colquhoun, h.h. smith, portrait, girls' preparatory classes, world war two, w. williams, raaf, w.s. williams, william william, william williams, new workshops, herbert j. trevenen, harold herbert death, les crouch, swimming, ballarat city baths, heather scott, clunes hospital nurses' quarters, ballarat ladies' art association scholarships, samuel henry mayo, samuel mayo death, girls preparatory classes, w. william, pilot, killed in action, education reform, ballarat schoool of mines museum, h.j. trevenen, world war ii, world war 2, ballarat junior technical school war service, nurses quarters, guncotton factory building, s. mayo death, initiation, ballarat school of mines scrapbook, newsclippings, j.r. pound, macrobertson scholarship, a.w. steane, ballarat junior technical school, wiltshire's poster competition, ballarat junior technical school old boys' association, ballarat junior technical school old boys' reunion, nornie gude, a. nye, albino paganettu, betty brown, dorothy woolcock, jean coates, jack hewitt, hazel robinson, gilda gude, white flat oval, gauge tower demolition, a.f. hesiltine, darwin, victor greenhalgh, frederick martell, memorial trees, cliff ellis, valda king, pharmacy, reunion, engineering workshops, thomas k. sim, daylesford, battery, h.h. smith reunion, ballarat technical art school reunion, w.h. middleton obituary, munition makers, plumbers, pottery industry, girls education, munition trainees, lady tracers, waterloo prize money, war museum, art as vocation, art education, nine-inch telescope, returned soldiers' league, repatriation classes, pinkertson scholarship, amel robert gordon, projector, pethard cup, ballarat food appeal for britain, queen mary, ballarat swimming pool, ballarat school of mines initiation, swimming carneval, prime ministers avenue, edgar mcconnon, community theatre project, world war two service, john l. burt, hockey, pottery, ceramics, ballarat school of mines coat of arms, coat of arms, k. bremner, red cross hut, s.m.b. follies, ken palmer, s. mayo, chinese, albert steane, university women, a.f. heseltine -
 Federation University Historical Collection
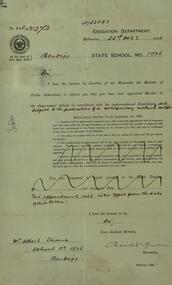
Plan, Ballarat School of Mines Future Development: A Southern Terminal to Lydiard Street, 1947, 09/12/1947
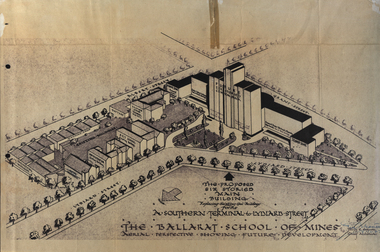
In 1947 Percy Everett, Chief Architect for the Victorian Government, drew up plans to accomodate the growth in student numbers on the Ballarat School of Mines site. It was an era of government buildings surrounding the Ballarat School of Mines campus either being transfered to the school or foreshadowed for transfer. In 1947 two Red Cross huts were transferred from Victoria Park to the western side of the former Ballarat Supreme Court (later Courthouse Theatre) for use by Wool Classing and Motor Mechanics. In the same year additional facilities were provided for Pottery due to the increase in enrolments and a large brick classroom was built at the rear of the Ballarat Junior Technical School Building. In the annual report of 1947 the President said: "These transfers are, however, only temporary expedients and indicate the pressing need for more buildings of a permanent nature". By the end of the year the School Council decided to request the Education Department of Victoria to proceed with the implementation of the School's long-range plan whch had received approval earlier and to treat it as an urgent post-war requirement. After much communication a plan for a six-storied building, flanked by two three storied buildings was planned to be built on the site of the Ballarat Gaol was developed. The plan was sent to the Education Department for the Minister's Approval. It is not know if approval was granted, but the building did not proceed, possibly becausse the Ballarat Gaol was still very miuch in use. When a tertiary division of the Ballarat School of Mines was being developed in 1967 it corresponded with the closure of the Ballarat Gaol. It was determined that the Lydiard Street South site had no room for future growth so a new campus was sought. The new campus was purchased at Mt Helen, and was initially known as the Ballarat Insittute of Advanced Education. In 1976, when the Ballarat Teachers' College merged into the structure, the campus became known as the Ballarat College of Advanced Education and it was no longer a part of the Ballarat School of Mines. Plans for a proposed building to replace the Ballarat Gaol buildings. The proposed building was never built, the concept being replaced by a new teritary facility at Mt Helen. buildings, percy everett, ballarat school of mines battery, ballarat technical art school, engineering workshops, machine shop, ballarat junior technical school, architectural plans, ballarat school of mines, smb campus -
 Federation University Historical Collection
Photograph - Photograph - Colour, Ballarat School of Mines Students
Colour photograph showing students undertaking classeslibrary, audio visual, canteen, computer centre, student centre, counselling, typing, canoeing, pottery, woolclassing, bricklaying, welding, biology, motor mechanics, ballarat school of mines, alumni -
 Flagstaff Hill Maritime Museum and Village
Ceramic - Dish, Johnson Bros, Circa 1883 (very early Mark)
Johnson Brothers were a British tableware manufacturer and exporter that was noted for its early introduction of "semi-porcelain" tableware. It was among the most successful of the Staffordshire potteries which produced tableware, much of it exported from the 1890s through the 1960s. They were also important manufacturers of large bathroom ceramics. The company was founded in 1883, but from 1968 to 2015 it operated as a part of the Wedgwood Group. However, after the Wedgwood Group was acquired by Fiskars in 2015, the production of Johnson Brothers was discontinued. The company's name derives from the names of the company's founders. The four original "Johnson Brothers" were Alfred, Frederick, Henry, and Robert. Their father married the daughter of a master potter, Alfred Meakin. In 1883, Alfred and Frederick Johnson began production at defunct pottery, known as the Charles Street Works, that they had purchased at a bankruptcy sale in Hanley, Stoke-on-Trent. At first, they specialised in the manufacture of durable earthenware, which they called "White Granite". The success of this venture led to rapid expansion. In 1888, the Rev. Henry Johnson joined them, followed ten years later by a fourth brother, Robert Johnson. Having established a solid reputation producing basic "whiteware", the company developed a product known as "semi-porcelain", a range of pottery that had the characteristics of fine china, but the durability of ironstone ware. This kind of tableware soon became very popular in the United States due to its durability and low cost. In 1889, the Hanley pottery was opened, later the Alexander pottery, and in 1891 the Imperial Works Pottery. In 1896, the Trent Sanitary Works was opened for the production of non-tableware products, and Alfred Johnson left the business to establish his pottery. By 1898, Robert Johnson had relocated to New York City to manage Johnson Brothers' rapid expansion into the North American market. An item that gives a snapshot into the emerging market for tableware that was reasonably priced and serviceable. The company produced "whiteware" but the innervation of the pottery line called semi-porcelain changed the industry. This allowed potteries to produce fashionable pottery items that were affordable to all social classes of the time. Bowl white ceramic decorative with floral decoration around lip. On base, "Royal Ironside China, Johnson Bros England" & crest of lion and unicorn flagstaff hill, warrnambool, shipwrecked coast, flagstaff hill maritime museum, flagstaff hill maritime village, great ocean road, bowl, china bowl, lion and unicorn crest, table ware, kitchen ware, white ware, johnson brothers -
 Vision Australia
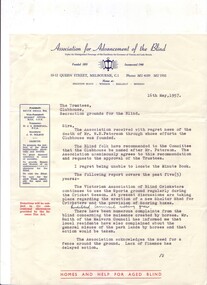
Letter - Text, Letter to The Trustees, Clubhouse, Recreation grounds for the Blind, 16/5/1957
... activities including a dance class, indoor bowling club, pottery... activities including a dance class, indoor bowling club, pottery ...Letter to the Trustees outlining the outcomes of a recent meeting, as the minute book was unable to be located. Below is a summary of the letter. The death of W.H. Paterson is mentioned and the recommendation to the Committee that the clubhouse by named in his honour was unanimously accepted, however requires the agreement of the Trustees. The remainder of the letter covers the past five years. The Victorian Association of Blind Cricketers are requesting the erection of a shelter shed and scoring boxes. Complaints have been received about horses using the park, which have been passed to Malvern Council who advise they have also received similar complaints from the general public. A fence is required but a lack of finance has delayed this action. The Clubhouse is being used for more activities including a dance class, indoor bowling club, pottery and craft work, therefore a new switchboard and rewiring were completed. In October 1955, the State Government offered funding through local councils, however despite a representation to the Minister, the Malvern Council were not willing to expend funds to the Association as they had committed to build an Elderly Citizens Club. A large signboard was repainted and a new signboard erected at the front entrance, along with a light controlled by a clock. The Clubhouse has also been used one night per month by the local branch of the RSL and occasional use by the Teachers College for inter College sports. There has been cooperation with the L.T.A.V. (Lawn Tennis Association of Victoria) during tennis championships, and although the Committee recognise the need to do more with the area, the impending homes been built at Ballarat and Bendigo have been a limited factor. Signed by J.W. Wilson3 pages of type letter on letterheadAssociation for the Advancement of the Blind, Under the Distinguished Patronage of His Excellency the Governor of Victoria and Lady Brooks Founded 1895 (image of shining lantern) Incorporated 1944 10-12 Queen Street, Melbourne, C.1. Phone: MU 4189 MU 1955 Homes at: Brighton Beach Windsor Ballarat Bendigo On the left hand side of the page: President: Bruce Small, Esq. Vice President: Hubert Opperman, O.B.E. Treasurer: W.J.S. Horsfall, F.C.A. Secretary: J.W. Wilson Objects: To promote the welfare of the Blind intellectually, physically and socially. To grant financial assistance in cases of necessity. To provide Homes and Hostels of an undenominational character for the Blind. To visit the Blind. To care for the adult Blind, especially the aged and infirm. Donations will be subject to the concessional allowances provided by the Income Tax Act. At the base of the page: Homes and help for aged blindassociation for the advancement of the blind, john wilson, kooyong club house -
 Flagstaff Hill Maritime Museum and Village
Domestic object - Plate
The Process of Making Pottery Decorating, Firing, Glazing, Making, Technical There is a rhythm and flow to clay. It can’t be done all at once! Even the making process! It can take weeks to get everything done, especially if you can only work on your pottery once a week! Even though we have three hour classes, it’s often just not enough time! Here is an overview of some of the processes so you have a bit more grasp on some of the technical stuff! Step One – Design There are SO many ideas out there for making stuff in clay! From delicate porcelain jewellery, through to heavy sculptural work and everything in between. Deciding your direction is sometimes not that easy – when you first start, try everything, you will naturally gravitate to the style that you enjoy! The options and variations are endless and can get a wee bit overwhelming too! Check in with me before you start to ensure your ideas will work, what order you might do things, how you could achieve the look you are seeking and any other technical data required! Step Two – Making Clay is thixotropic. This means that as you work with it, the clay first gets sloppier and wetter, before is begins to dry in the atmosphere. For most things, you simply can’t do all parts of the project at once. An example of work order might look like: Get last weeks work out from the shelves Prepare clay for today’s work – roll your clay, prepare balls for throwing, make the first stage of a pinch pot) Clean up last week’s work and put it on the shelf for bisque firing Check that you have any glazing to do – and do enough of it that you will have time to finish your main project Do the next step of your next project – there might be a further step that can’t be complete immediately, in that case, wrap your work well and put onto the shelves. Letting your work rest for a while can really help keep your work clean and professional looking. Many things require bagging under plastic to keep it ready for work the next week – put your name on the outside of the bag so you can find your work easily. We have stickers and markers. Consider how you want to decorate your work – coloured slip can be applied at a fairly wet stage (remembering that it will make your work even wetter!). Trying to apply slip to dry clay won’t work! If you want to do sgraffito – you will need to keep the work leather hard (a state of dryness where you can still work the clay with a little effort and a little water and care). Step Three – Drying Most of the time your work can go into the rack uncovered to let it dry out for the following week. If you want to continue forming or shaping you will need to double bag your work – put your work on a suitable sized bat and put the bat in a bag so the base of the bag is under the bat, then put another bag over the top of the work and tuck the top of the bag under the bat. If you want to trim (or turn) your thrown work the following week, it should also be double bagged. If your work is large, delicate, or of uneven thicknesses, you should lightly cover your work for drying. When considering the drying process, bare in mind the weather, humidity and wind! The hotter and dryer, the faster things dry and work can dry unevenly in the shelves – this can lead to cracking – another time to lightly cover your work for drying. Step Four – Trimming and Cleaning Up Your work is dry! It is called greenware now and it is at it’s most fragile! Handle everything with two hands. I often refer to soft hands – keep everything gentle and with your fingers spread as much as possible. Try to not pick up things like plates too much, and always with both hands! Before your work can be bisque fired it should be “cleaned up”. You work won’t go into the kiln if it has sharp edges – when glazed, sharp edges turn into razor blades! Use a piece of fly wire to rub the work all over – this will scratch a little so be light handed. Use a knife or metal kidney to scrape any areas that require a bit more dynamic treatment than the fly wire offers! Finally, a very light wipe over with a slightly damp sponge can help soften and soothe all of your edges and dags! Trimming thrown work: If you are planning to trim (or turn) your thrown work (and you should be), make sure you bag it well – your work should be leather hard to almost dry for easiest trimming. Use this step to finish the work completely – use a metal kidney to polish the surface, or a slightly damp sponge to give a freshly thrown look. Wipe the sponge around the rim after trimming, and check the inside of the pot for dags! Trimming slip cast work: Usually I will trim the rims of your work on the wheel the following day to make that stage easier, however you will still need to check your work for lumps and bumps. Last but not least – check that your name is still clearly on the bottom of your work. Step Five – Bisque Firing When the work is completely dry it can go into the bisque kiln. The bisque kiln is fired to 1000°C. This process burns off the water in the clay as well as some of the chemically bound water. The structure of the clay is not altered that much at this temperature. Inside the bisque kiln, the work is stacked a little, small bowl inside a larger bowl and onto a heavy plate. Smaller items like decorations or drink coasters might get stacked several high. Consideration is paid to the weight of the stack and shape of the work. A bisque kiln can fire about one and a half times the amount of work that the glaze kiln can fire. The firing takes about 10 hours to complete the cycle and about two days to cool down. Once it has been emptied the work is placed in the glaze room ready for you to decorate! Step Six – Glazing Decorating your work with colour can be a lot of fun – and time consuming! There are three main options for surface treatment at this stage: Oxide Washes Underglazes Glazes Washes and underglazes do not “glaze” the work – It will still need a layer of glaze to fully seal the clay (washes don’t need glaze on surfaces not designed for food or liquid as they can gloss up a little on their own). Underglazes are stable colourants that turn out pretty much how they look in the jar. They can be mixed with each other to form other colours and can be used like water colours to paint onto your work. Mostly they should have a clear glaze on top to seal them. Oxides are a different species – the pink oxide (cobalt) wash turns out bright blue for instance. They don’t always need a glaze on top, and some glazes can change the colour of the wash! The glazes need no other “glaze” on top! Be careful of unknown glaze interactions – you can put any combination of glaze in a bowl or on a plate, but only a single glaze on the outside of any vertical surface! Glazes are a chemical reaction under heat. We don’t know the exact chemicals in the Mayco glazes we use. I can guess by the way they interact with each other, however, on the whole, you need to test every idea you have, and not run the test on a vertical surface! Simply put, glaze is a layer of glass like substance that bonds with the clay underneath. Clay is made of silica, alumina and water. Glaze is made of mostly silica. Silica has a melting point of 1700°C and we fire to 1240°C. The silica requires a “flux” to help it melt at the lower temperature. Fluxes can be all sorts of chemicals – a common one is calcium – calcium has a melting point of 2500°C, however, together they both melt at a much lower temperature! Colourants are metal oxides like cobalt (blue), chrome (green through black), copper (green, blue, even red!), manganese (black, purple and pink) iron (red brown), etc. Different chemicals in the glaze can have dramatic effects. for example, barium carbonate (which we don’t use) turns manganese bright pink! Other elements can turn manganese dioxide brown, blue, purple and reddish brown. Manganese dioxide is a flux in and of itself as well. So, glazes that get their black and purple colours, often interact with other glazes and RUN! Our mirror black is a good example – it mixes really well with many glazes because it fluxes them – causes them to melt faster. It will also bring out many beautiful colours in the glazes because it’s black colouring most definitely comes from manganese dioxide! Glaze chemistry is a whole subject on it’s own! We use commercial Mayco glazes on purpose – for their huge range of colour possibilities, stability, cool interactions, artistic freedom with the ability to easily brush the glazes on and ease of use. We currently have almost 50 glazes on hand! A major project is to test the interactions of all glazes with each other. That is 2,500 test tiles!!!! I’m going to make the wall behind the wheels the feature wall of pretty colours! Step Seven – Glaze (Gloss or sometimes called “Glost”) Firing Most of the time this is the final stage of making your creation (but not always!) The glaze kiln goes to 1240°C. This is called cone 6, or midrange. It is the low end of stoneware temperatures. Stoneware clays and glazes are typically fired at cone 8 – 10, that is 1260 – 1290°C. The energy requirement to go from 1240°C to 1280°C is almost a 30% more! Our clay is formulated to vitrify (mature, turn “glass-like”) at 1240°, as are our glazes. A glaze kiln take around 12 hours to reach temperature and two to three days to cool down. Sometimes a third firing process is required – this is for decoration that is added to work after the glaze firing. For example – adding precious metals and lustres. this firing temperature is usually around 600 – 800°C depending upon the techniques being used. There are many students interested in gold and silver trims – we will be doing this third type of firing soon! After firing your work will be in the student finished work shelves. Remember to pay for it before you head out the door! There is a small extra charge for using porcelain clay (it’s more than twice the price of regular clay), and for any third firing process! Once your work has been fired it can not turn back into clay for millennia – so don’t fire it if you don’t like it! Put it in the bucket for recycling. https://firebirdstudios.com.au/the-process-of-making-pottery/Ceramics have evolved over thousands of years.White earthenware dinner plate. Crazing evident all over.Backstamped ‘Made in England S LTD’flagstaff hill, warrnambool, shipwrecked-coast, flagstaff-hill, flagstaff-hill-maritime-museum, maritime-museum, shipwreck-coast, flagstaff-hill-maritime-village, ceramics, tableware -
 Flagstaff Hill Maritime Museum and Village
Domestic object - Plate, Johnson Bros
The Process of Making Pottery Decorating, Firing, Glazing, Making, Technical There is a rhythm and flow to clay. It can’t be done all at once! Even the making process! It can take weeks to get everything done, especially if you can only work on your pottery once a week! Even though we have three hour classes, it’s often just not enough time! Here is an overview of some of the processes so you have a bit more grasp on some of the technical stuff! Step One – Design There are SO many ideas out there for making stuff in clay! From delicate porcelain jewellery, through to heavy sculptural work and everything in between. Deciding your direction is sometimes not that easy – when you first start, try everything, you will naturally gravitate to the style that you enjoy! The options and variations are endless and can get a wee bit overwhelming too! Check in with me before you start to ensure your ideas will work, what order you might do things, how you could achieve the look you are seeking and any other technical data required! Step Two – Making Clay is thixotropic. This means that as you work with it, the clay first gets sloppier and wetter, before is begins to dry in the atmosphere. For most things, you simply can’t do all parts of the project at once. An example of work order might look like: Get last weeks work out from the shelves Prepare clay for today’s work – roll your clay, prepare balls for throwing, make the first stage of a pinch pot) Clean up last week’s work and put it on the shelf for bisque firing Check that you have any glazing to do – and do enough of it that you will have time to finish your main project Do the next step of your next project – there might be a further step that can’t be complete immediately, in that case, wrap your work well and put onto the shelves. Letting your work rest for a while can really help keep your work clean and professional looking. Many things require bagging under plastic to keep it ready for work the next week – put your name on the outside of the bag so you can find your work easily. We have stickers and markers. Consider how you want to decorate your work – coloured slip can be applied at a fairly wet stage (remembering that it will make your work even wetter!). Trying to apply slip to dry clay won’t work! If you want to do sgraffito – you will need to keep the work leather hard (a state of dryness where you can still work the clay with a little effort and a little water and care). Step Three – Drying Most of the time your work can go into the rack uncovered to let it dry out for the following week. If you want to continue forming or shaping you will need to double bag your work – put your work on a suitable sized bat and put the bat in a bag so the base of the bag is under the bat, then put another bag over the top of the work and tuck the top of the bag under the bat. If you want to trim (or turn) your thrown work the following week, it should also be double bagged. If your work is large, delicate, or of uneven thicknesses, you should lightly cover your work for drying. When considering the drying process, bare in mind the weather, humidity and wind! The hotter and dryer, the faster things dry and work can dry unevenly in the shelves – this can lead to cracking – another time to lightly cover your work for drying. Step Four – Trimming and Cleaning Up Your work is dry! It is called greenware now and it is at it’s most fragile! Handle everything with two hands. I often refer to soft hands – keep everything gentle and with your fingers spread as much as possible. Try to not pick up things like plates too much, and always with both hands! Before your work can be bisque fired it should be “cleaned up”. You work won’t go into the kiln if it has sharp edges – when glazed, sharp edges turn into razor blades! Use a piece of fly wire to rub the work all over – this will scratch a little so be light handed. Use a knife or metal kidney to scrape any areas that require a bit more dynamic treatment than the fly wire offers! Finally, a very light wipe over with a slightly damp sponge can help soften and soothe all of your edges and dags! Trimming thrown work: If you are planning to trim (or turn) your thrown work (and you should be), make sure you bag it well – your work should be leather hard to almost dry for easiest trimming. Use this step to finish the work completely – use a metal kidney to polish the surface, or a slightly damp sponge to give a freshly thrown look. Wipe the sponge around the rim after trimming, and check the inside of the pot for dags! Trimming slip cast work: Usually I will trim the rims of your work on the wheel the following day to make that stage easier, however you will still need to check your work for lumps and bumps. Last but not least – check that your name is still clearly on the bottom of your work. Step Five – Bisque Firing When the work is completely dry it can go into the bisque kiln. The bisque kiln is fired to 1000°C. This process burns off the water in the clay as well as some of the chemically bound water. The structure of the clay is not altered that much at this temperature. Inside the bisque kiln, the work is stacked a little, small bowl inside a larger bowl and onto a heavy plate. Smaller items like decorations or drink coasters might get stacked several high. Consideration is paid to the weight of the stack and shape of the work. A bisque kiln can fire about one and a half times the amount of work that the glaze kiln can fire. The firing takes about 10 hours to complete the cycle and about two days to cool down. Once it has been emptied the work is placed in the glaze room ready for you to decorate! Step Six – Glazing Decorating your work with colour can be a lot of fun – and time consuming! There are three main options for surface treatment at this stage: Oxide Washes Underglazes Glazes Washes and underglazes do not “glaze” the work – It will still need a layer of glaze to fully seal the clay (washes don’t need glaze on surfaces not designed for food or liquid as they can gloss up a little on their own). Underglazes are stable colourants that turn out pretty much how they look in the jar. They can be mixed with each other to form other colours and can be used like water colours to paint onto your work. Mostly they should have a clear glaze on top to seal them. Oxides are a different species – the pink oxide (cobalt) wash turns out bright blue for instance. They don’t always need a glaze on top, and some glazes can change the colour of the wash! The glazes need no other “glaze” on top! Be careful of unknown glaze interactions – you can put any combination of glaze in a bowl or on a plate, but only a single glaze on the outside of any vertical surface! Glazes are a chemical reaction under heat. We don’t know the exact chemicals in the Mayco glazes we use. I can guess by the way they interact with each other, however, on the whole, you need to test every idea you have, and not run the test on a vertical surface! Simply put, glaze is a layer of glass like substance that bonds with the clay underneath. Clay is made of silica, alumina and water. Glaze is made of mostly silica. Silica has a melting point of 1700°C and we fire to 1240°C. The silica requires a “flux” to help it melt at the lower temperature. Fluxes can be all sorts of chemicals – a common one is calcium – calcium has a melting point of 2500°C, however, together they both melt at a much lower temperature! Colourants are metal oxides like cobalt (blue), chrome (green through black), copper (green, blue, even red!), manganese (black, purple and pink) iron (red brown), etc. Different chemicals in the glaze can have dramatic effects. for example, barium carbonate (which we don’t use) turns manganese bright pink! Other elements can turn manganese dioxide brown, blue, purple and reddish brown. Manganese dioxide is a flux in and of itself as well. So, glazes that get their black and purple colours, often interact with other glazes and RUN! Our mirror black is a good example – it mixes really well with many glazes because it fluxes them – causes them to melt faster. It will also bring out many beautiful colours in the glazes because it’s black colouring most definitely comes from manganese dioxide! Glaze chemistry is a whole subject on it’s own! We use commercial Mayco glazes on purpose – for their huge range of colour possibilities, stability, cool interactions, artistic freedom with the ability to easily brush the glazes on and ease of use. We currently have almost 50 glazes on hand! A major project is to test the interactions of all glazes with each other. That is 2,500 test tiles!!!! I’m going to make the wall behind the wheels the feature wall of pretty colours! Step Seven – Glaze (Gloss or sometimes called “Glost”) Firing Most of the time this is the final stage of making your creation (but not always!) The glaze kiln goes to 1240°C. This is called cone 6, or midrange. It is the low end of stoneware temperatures. Stoneware clays and glazes are typically fired at cone 8 – 10, that is 1260 – 1290°C. The energy requirement to go from 1240°C to 1280°C is almost a 30% more! Our clay is formulated to vitrify (mature, turn “glass-like”) at 1240°, as are our glazes. A glaze kiln take around 12 hours to reach temperature and two to three days to cool down. Sometimes a third firing process is required – this is for decoration that is added to work after the glaze firing. For example – adding precious metals and lustres. this firing temperature is usually around 600 – 800°C depending upon the techniques being used. There are many students interested in gold and silver trims – we will be doing this third type of firing soon! After firing your work will be in the student finished work shelves. Remember to pay for it before you head out the door! There is a small extra charge for using porcelain clay (it’s more than twice the price of regular clay), and for any third firing process! Once your work has been fired it can not turn back into clay for millennia – so don’t fire it if you don’t like it! Put it in the bucket for recycling. https://firebirdstudios.com.au/the-process-of-making-pottery/Ceramics have evolved over thousands of years.A white earthenware side plate with a gadroon edge. Has water marks and chips on front.‘Johnson Bros England Reg No 15587’flagstaff hill, warrnambool, shipwrecked-coast, flagstaff-hill, flagstaff-hill-maritime-museum, maritime-museum, shipwreck-coast, flagstaff-hill-maritime-village, johnson bros, ceramics, tableware -
 Flagstaff Hill Maritime Museum and Village
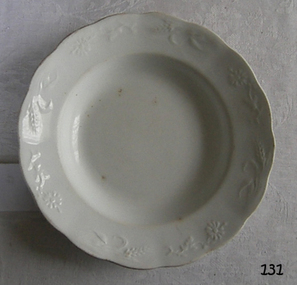
Domestic object - Plate, Alfred Meakin
The Process of Making Pottery Decorating, Firing, Glazing, Making, Technical There is a rhythm and flow to clay. It can’t be done all at once! Even the making process! It can take weeks to get everything done, especially if you can only work on your pottery once a week! Even though we have three hour classes, it’s often just not enough time! Here is an overview of some of the processes so you have a bit more grasp on some of the technical stuff! Step One – Design There are SO many ideas out there for making stuff in clay! From delicate porcelain jewellery, through to heavy sculptural work and everything in between. Deciding your direction is sometimes not that easy – when you first start, try everything, you will naturally gravitate to the style that you enjoy! The options and variations are endless and can get a wee bit overwhelming too! Check in with me before you start to ensure your ideas will work, what order you might do things, how you could achieve the look you are seeking and any other technical data required! Step Two – Making Clay is thixotropic. This means that as you work with it, the clay first gets sloppier and wetter, before is begins to dry in the atmosphere. For most things, you simply can’t do all parts of the project at once. An example of work order might look like: Get last weeks work out from the shelves Prepare clay for today’s work – roll your clay, prepare balls for throwing, make the first stage of a pinch pot) Clean up last week’s work and put it on the shelf for bisque firing Check that you have any glazing to do – and do enough of it that you will have time to finish your main project Do the next step of your next project – there might be a further step that can’t be complete immediately, in that case, wrap your work well and put onto the shelves. Letting your work rest for a while can really help keep your work clean and professional looking. Many things require bagging under plastic to keep it ready for work the next week – put your name on the outside of the bag so you can find your work easily. We have stickers and markers. Consider how you want to decorate your work – coloured slip can be applied at a fairly wet stage (remembering that it will make your work even wetter!). Trying to apply slip to dry clay won’t work! If you want to do sgraffito – you will need to keep the work leather hard (a state of dryness where you can still work the clay with a little effort and a little water and care). Step Three – Drying Most of the time your work can go into the rack uncovered to let it dry out for the following week. If you want to continue forming or shaping you will need to double bag your work – put your work on a suitable sized bat and put the bat in a bag so the base of the bag is under the bat, then put another bag over the top of the work and tuck the top of the bag under the bat. If you want to trim (or turn) your thrown work the following week, it should also be double bagged. If your work is large, delicate, or of uneven thicknesses, you should lightly cover your work for drying. When considering the drying process, bare in mind the weather, humidity and wind! The hotter and dryer, the faster things dry and work can dry unevenly in the shelves – this can lead to cracking – another time to lightly cover your work for drying. Step Four – Trimming and Cleaning Up Your work is dry! It is called greenware now and it is at it’s most fragile! Handle everything with two hands. I often refer to soft hands – keep everything gentle and with your fingers spread as much as possible. Try to not pick up things like plates too much, and always with both hands! Before your work can be bisque fired it should be “cleaned up”. You work won’t go into the kiln if it has sharp edges – when glazed, sharp edges turn into razor blades! Use a piece of fly wire to rub the work all over – this will scratch a little so be light handed. Use a knife or metal kidney to scrape any areas that require a bit more dynamic treatment than the fly wire offers! Finally, a very light wipe over with a slightly damp sponge can help soften and soothe all of your edges and dags! Trimming thrown work: If you are planning to trim (or turn) your thrown work (and you should be), make sure you bag it well – your work should be leather hard to almost dry for easiest trimming. Use this step to finish the work completely – use a metal kidney to polish the surface, or a slightly damp sponge to give a freshly thrown look. Wipe the sponge around the rim after trimming, and check the inside of the pot for dags! Trimming slip cast work: Usually I will trim the rims of your work on the wheel the following day to make that stage easier, however you will still need to check your work for lumps and bumps. Last but not least – check that your name is still clearly on the bottom of your work. Step Five – Bisque Firing When the work is completely dry it can go into the bisque kiln. The bisque kiln is fired to 1000°C. This process burns off the water in the clay as well as some of the chemically bound water. The structure of the clay is not altered that much at this temperature. Inside the bisque kiln, the work is stacked a little, small bowl inside a larger bowl and onto a heavy plate. Smaller items like decorations or drink coasters might get stacked several high. Consideration is paid to the weight of the stack and shape of the work. A bisque kiln can fire about one and a half times the amount of work that the glaze kiln can fire. The firing takes about 10 hours to complete the cycle and about two days to cool down. Once it has been emptied the work is placed in the glaze room ready for you to decorate! Step Six – Glazing Decorating your work with colour can be a lot of fun – and time consuming! There are three main options for surface treatment at this stage: Oxide Washes Underglazes Glazes Washes and underglazes do not “glaze” the work – It will still need a layer of glaze to fully seal the clay (washes don’t need glaze on surfaces not designed for food or liquid as they can gloss up a little on their own). Underglazes are stable colourants that turn out pretty much how they look in the jar. They can be mixed with each other to form other colours and can be used like water colours to paint onto your work. Mostly they should have a clear glaze on top to seal them. Oxides are a different species – the pink oxide (cobalt) wash turns out bright blue for instance. They don’t always need a glaze on top, and some glazes can change the colour of the wash! The glazes need no other “glaze” on top! Be careful of unknown glaze interactions – you can put any combination of glaze in a bowl or on a plate, but only a single glaze on the outside of any vertical surface! Glazes are a chemical reaction under heat. We don’t know the exact chemicals in the Mayco glazes we use. I can guess by the way they interact with each other, however, on the whole, you need to test every idea you have, and not run the test on a vertical surface! Simply put, glaze is a layer of glass like substance that bonds with the clay underneath. Clay is made of silica, alumina and water. Glaze is made of mostly silica. Silica has a melting point of 1700°C and we fire to 1240°C. The silica requires a “flux” to help it melt at the lower temperature. Fluxes can be all sorts of chemicals – a common one is calcium – calcium has a melting point of 2500°C, however, together they both melt at a much lower temperature! Colourants are metal oxides like cobalt (blue), chrome (green through black), copper (green, blue, even red!), manganese (black, purple and pink) iron (red brown), etc. Different chemicals in the glaze can have dramatic effects. for example, barium carbonate (which we don’t use) turns manganese bright pink! Other elements can turn manganese dioxide brown, blue, purple and reddish brown. Manganese dioxide is a flux in and of itself as well. So, glazes that get their black and purple colours, often interact with other glazes and RUN! Our mirror black is a good example – it mixes really well with many glazes because it fluxes them – causes them to melt faster. It will also bring out many beautiful colours in the glazes because it’s black colouring most definitely comes from manganese dioxide! Glaze chemistry is a whole subject on it’s own! We use commercial Mayco glazes on purpose – for their huge range of colour possibilities, stability, cool interactions, artistic freedom with the ability to easily brush the glazes on and ease of use. We currently have almost 50 glazes on hand! A major project is to test the interactions of all glazes with each other. That is 2,500 test tiles!!!! I’m going to make the wall behind the wheels the feature wall of pretty colours! Step Seven – Glaze (Gloss or sometimes called “Glost”) Firing Most of the time this is the final stage of making your creation (but not always!) The glaze kiln goes to 1240°C. This is called cone 6, or midrange. It is the low end of stoneware temperatures. Stoneware clays and glazes are typically fired at cone 8 – 10, that is 1260 – 1290°C. The energy requirement to go from 1240°C to 1280°C is almost a 30% more! Our clay is formulated to vitrify (mature, turn “glass-like”) at 1240°, as are our glazes. A glaze kiln take around 12 hours to reach temperature and two to three days to cool down. Sometimes a third firing process is required – this is for decoration that is added to work after the glaze firing. For example – adding precious metals and lustres. this firing temperature is usually around 600 – 800°C depending upon the techniques being used. There are many students interested in gold and silver trims – we will be doing this third type of firing soon! After firing your work will be in the student finished work shelves. Remember to pay for it before you head out the door! There is a small extra charge for using porcelain clay (it’s more than twice the price of regular clay), and for any third firing process! Once your work has been fired it can not turn back into clay for millennia – so don’t fire it if you don’t like it! Put it in the bucket for recycling. https://firebirdstudios.com.au/the-process-of-making-pottery/Ceramics have evolved over thousands of years.Earthenware dessert plate, cream colour. Made by Alfred Meakin, England. Backstamped ‘Alfred Meakin England’. flagstaff hill, warrnambool, shipwrecked-coast, flagstaff-hill, flagstaff-hill-maritime-museum, maritime-museum, shipwreck-coast, flagstaff-hill-maritime-village, alfred meakin, ceramics, earthenware, kitchenware -
Federation University Historical Collection
Book, Ballarat Technical Art School Register, 1955-1971
The Ballarat Technical Art School (No. 10) was a division of the Ballarat School of Mines. Green ledger with black spine. Lists Student Number, Name, Trade or Occupation, Age at Last Birthday, Address, Date of Joining the School, Course Work. Courses listed include dressmaking, Elementary Art, Ticket Writing, Shorthand, Drawing, Pottery and Drawing. Pottery, Millinery. Junior Art, Building Construction, Matriculation Art, Needlework, Painting, Life Class, Decorative Needlework, General Art Course, Sculptureballarat technical art school, art general register, student enrolments, alumni, art studies, ballarat school of mines -
 Eltham District Historical Society Inc
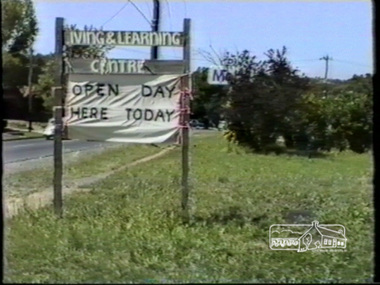
Film - Video (VHS), Open Day Eltham Living and Learning Centre, 1988
This cottage-like dwelling has changed ownership several times since it was first built in the 1850s by local tanner John Pearson. The Living and Learning Centre as we know it today is the product of the energetic, reforming era of the Whitlam Government. Set up by the local council in 1974. Unedited amateur video (filmed by Vivienne?) with some voiceover and chatting with others. Significant VHS tape noise/flicker and colour pulsing. Opens with Living & Learning Centre sign on Main Road and “Open Day Here Today” attached to it. Views of entrance into carpark, dog obedience class demonstration near entrance, leadlight construction display in workshop, basket weaving, face painting, exterior garden landscape with herb garden, brick pottery shed, peppercorn tree, children’s activities, interior views showing artworks of life drawings, general engagement with other people (audio), candle room, pottery, children’s entertainer in garden, wool spinning, some attempts at engagement with Claire Fitzpatrick, Thai Chi demonstration, floral presentations, patchwork, needlepoint, knitting, some interior scenes very dark, weaving, cane basket weaving.VHS Video cassette (poor quality) Converted to MP4 file format 00:31:39; 746MBeltham living and learning centre, open day, dog obedience class, leadlight, basket weaving, face painting, artworks, life drawing, candle room, pottery, wool spinning, claire fitzpatrick, thai chi, patchwork, needlepoint, knitting, weaving, cane basket weaving, main road, eltham, video recording -
 Eltham District Historical Society Inc
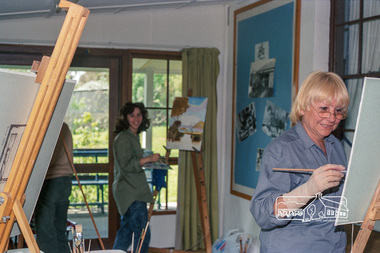
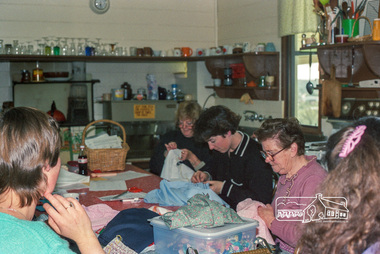
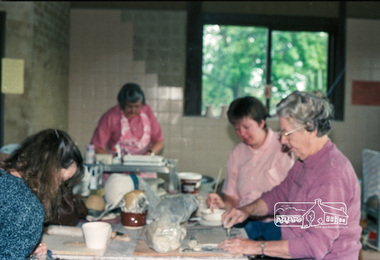
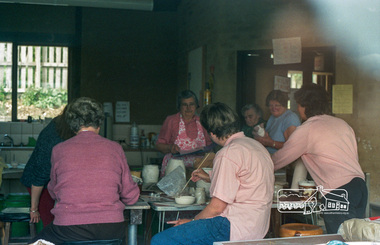
Photograph, Pottery Class, Eltham Living and Learning Centre, October 1988, 1988
... Pottery Class, Eltham Living and Learning Centre, October...pottery class... melbourne Photograph Pottery Class, Eltham Living and Learning ...Roll of 35mm colour negative film, 6 stripsFuji 100classes, eltham, living and learning centre, pottery class -
 Eltham District Historical Society Inc
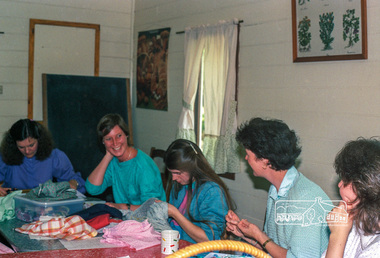
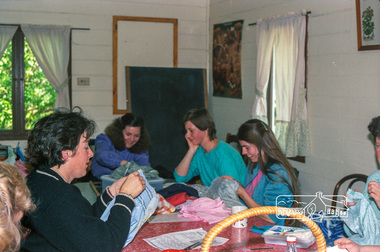
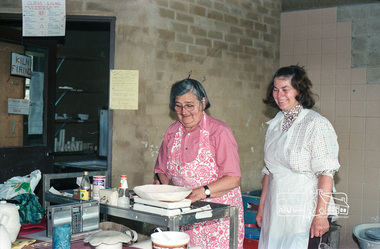
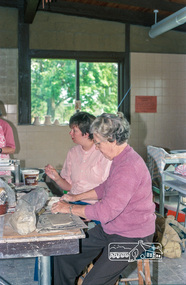
Negative - Photograph, Grace Mitchell and Ursula Dors, Pottery Class, Eltham Living and Learning Centre, Oct. 1988
... Grace Mitchell and Ursula Dors, Pottery Class, Eltham...pottery class..., Pottery Class, Eltham Living and Learning Centre Roll of 35mm ...Grace Mitchell, a talented artist in later life and baker managed a pastry shop business near the corner of Mt Pleasant and Main Roads Eltham in the 1950’s. Shortly after her marriage to Arthur Mitchell in 1948 he had an accident that caused a head injury and was unable to work. Grace realised she needed to be home to care for her husband as well as earn an income. She managed the bureaucracy of council permits, made modifications to her home with savings to get the business off the ground without having to borrow money. Grace and Arthur were avid gardeners and would grow, wash and mince vegetables for pasties while Grace hand made and rolled the pastry. They cooked and minced their own meat for the pies and the fruit for the sweet pies came from their orchard at the rear of the property. She also baked scones and cakes. Grace operated her pastry shop for over 16 years. She supported the Shillinglaw Cottage Preservation Campaign to preserve the cottage through its Flavour of Eltham community cookbook published in 1964 and hosted cooking classes in the new Living and Learning Centre. Grace Mitchell passed away aged 95 years in 2011.Roll of 35mm colour negative film, 6 strips and associated colour print 10 x 15 cmFuji 100classes, eltham, living and learning centre, pottery class, eltham living and learning centre, grace mitchell, ursula dors, teaching, learning -
 Eltham District Historical Society Inc
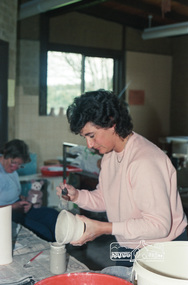
Photograph, Pottery Class, Eltham Living and Learning Centre, October 1988, 1988
... Pottery Class, Eltham Living and Learning Centre, October...pottery class... melbourne Photograph Pottery Class, Eltham Living and Learning ...Roll of 35mm colour negative film, 6 stripsFuji 100classes, eltham, living and learning centre, pottery class -
 Eltham District Historical Society Inc
Photograph, Pottery Class, Eltham Living and Learning Centre, October 1988, 1988
... Pottery Class, Eltham Living and Learning Centre, October...pottery class... melbourne Photograph Pottery Class, Eltham Living and Learning ...Roll of 35mm colour negative film, 6 stripsFuji 100classes, eltham, living and learning centre, pottery class